|
|
|
|
|
DIY Table Saw) With the need for a miter-, table- and track-saw to build an off-grid cabin, my options were limited. The small 1500W generator can power a mitersaw or circular saw, but a tablesaw would pull too much power. Upgrading the generator is of course an option, but then you also have to store the new equipment somewhere.
With the need for a miter-, table- and track-saw to build an off-grid cabin, my options were limited. The small 1500W generator can power a mitersaw or circular saw, but a tablesaw would pull too much power. Upgrading the generator is of course an option, but then you also have to store the new equipment somewhere.
YouTube shows many examples of people using an old skillsaw to create a tablesaw. Some are really fancy, trying to copy all the features a store bought machine has. That wasn't my goal, I needed something simple and cheap that probably will be used only sporadically to rip some 2x4 or 2x6 lumber. But then a bit more accurate than what a handheld circular saw will do. I have a trusted 30 year old chopsaw, so no need for a tablesaw sled or even a fence. My wishlist just consisted of 1) no drilling holes through the base of the skillsaw and 2) not mounting the saw under the table (what many people are doing), which limits the cutting depth. And did I mention already "keep it simple" ?? :) I put my DIY tablesaw on a pair of sawhorses, but of course you can always screw it down or make a dedicated frame for it. Stealing a couple of ideas from those YouTube's, I ended up with the following. The base is a 18x24" piece of three-quarter inch plywood, but feel free to make the table larger. The base of the circular saw rests on top of that plywood, so cut out a U-shape which is a ¼ inch smaller than the base of the saw. Move in the saw, raise the blade as far as you can and probably you will have to make tiny cut-outs for parts of the circular saw that are sticking out. Also, maybe here and there the ¾ inch base should be made thicker or thinner, in my case I used a chainsaw to make more space for lifting the motor. Next step is to cut another U-shaped layer of plywood (for my saw it needed to be half an inch thick) that "goes around" the base of the circular saw. The reason for not making it just a rectangular hole is that you need the front opening to shift the circular saw in and out: the base above and the motor under the table. Finally close the front with a strip of the ½ inch plywood and a few screws. I strongly advise to first make a mock-up using some scrap like OSB. Because the circular saw becomes upside-down, mistakes are quickly made like swapping left-right or front-to-back. Then when everything fits, make the whole setup again but now using some good quality plywood. The final touches are some tie-wraps to keep the trigger pressed and another to keep the blade guard lifted. Use an electrical extension block to switch the saw on and off. For a fence I use a straight length of wood and some clamps. But you could glue some dowels into the bottom of the fence and drill some matching holes in the plywood base to do this faster. Some people mention they need to hold the machine down, a concrete block and a piece of rope would do the trick :). It is amazing how much faster and more accurate you can now rip a couple of boards. And as the last image shows, storing the table-saw will take very little space.
|
|
|
TrackSaw Jig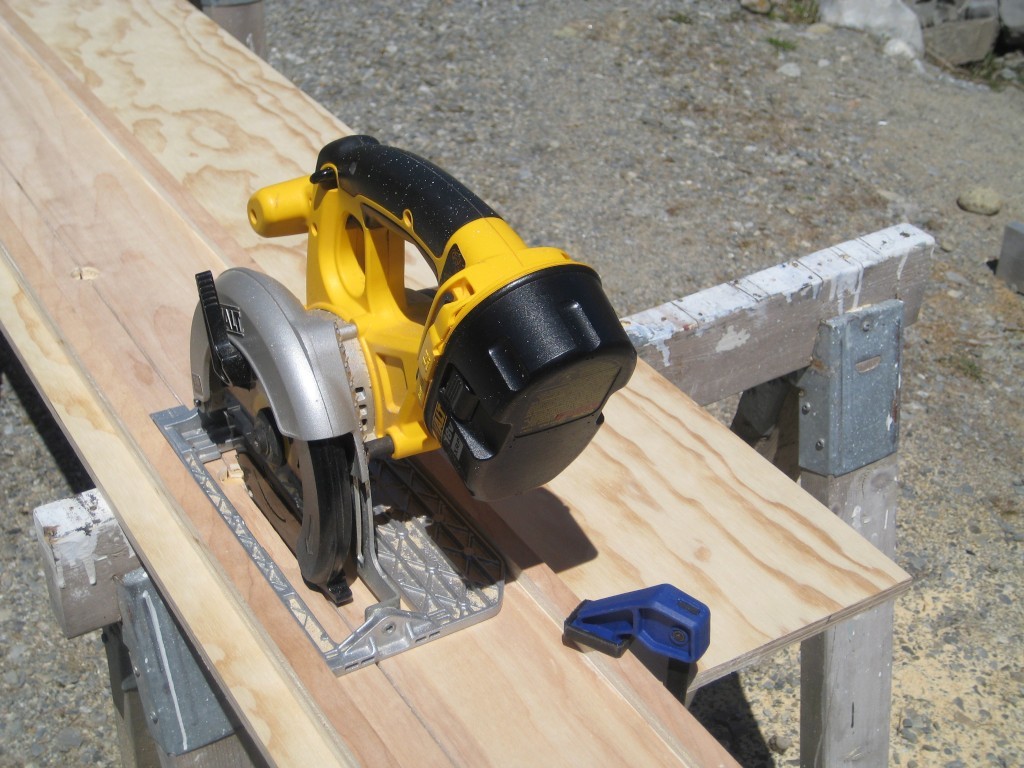 That's all well and good for ripping boards, but what about cutting large sheets of plywood. Yes, you can add some in- and out-tables, but (again :) some sawhorses provide a much easier solution, as long as you have a tracksaw. And you don't need to spend upwards of 500 dollars on buying a Festool.
Plenty of YouTube clips, like Wood Work Web or One Minute Workbench, that build such a jig. The simplest are just two strips of plywood screwed or glued together, relying on the straight factory edge of a sheet of plywood as a guide for the circular saw. Only one side of the saw is then supported, however for most people that will be "good enough". I didn't go for one of the designs with aluminum strips to guide the saw. But I did decide to make the jig which supports both sides of the circular saw. Still pretty simple to make and most likely at zero cost. The holes in the base are to check the line where you want to make your cut. Be aware that there are two types of circular saws, motor on the left or on the right side of the blade. Corded circular saws are typically the former, but battery powered ones the latter. However there are exceptions, like the original "SkillSaw". For a tracksaw that difference is important because to keep balance, the motor must be above the wide side of the track. Which means that with a corded saw you will make your cut left-to-right and with a battery powered one from right to left. Myself being right-handed, I prefer the latter, but YMMV :). This was a simple uncomplicated project, resulting in a jig very useful to have in your workshop. Plus a lot of fun to make!!
|
|
|
|